
Each year, I create new yard art to add to my holiday decorations based on The Simpsons. Here is my process for creating them, from start to finish.
In 2017, my husband, Nathan, and I decided we needed to up our game on our Christmas decorations. As huge fans of The Simpsons, we really wanted to include Homer in some way and I assumed I could find an inflatable Santa Homer somewhere — but alas he did not exist. Well, quickly that search became a mission — I was going to make my own Simpsons decorations. Hell, homemade Peanut holiday's are way better than any dumb inflatable anyway, if they can do it — so can I!
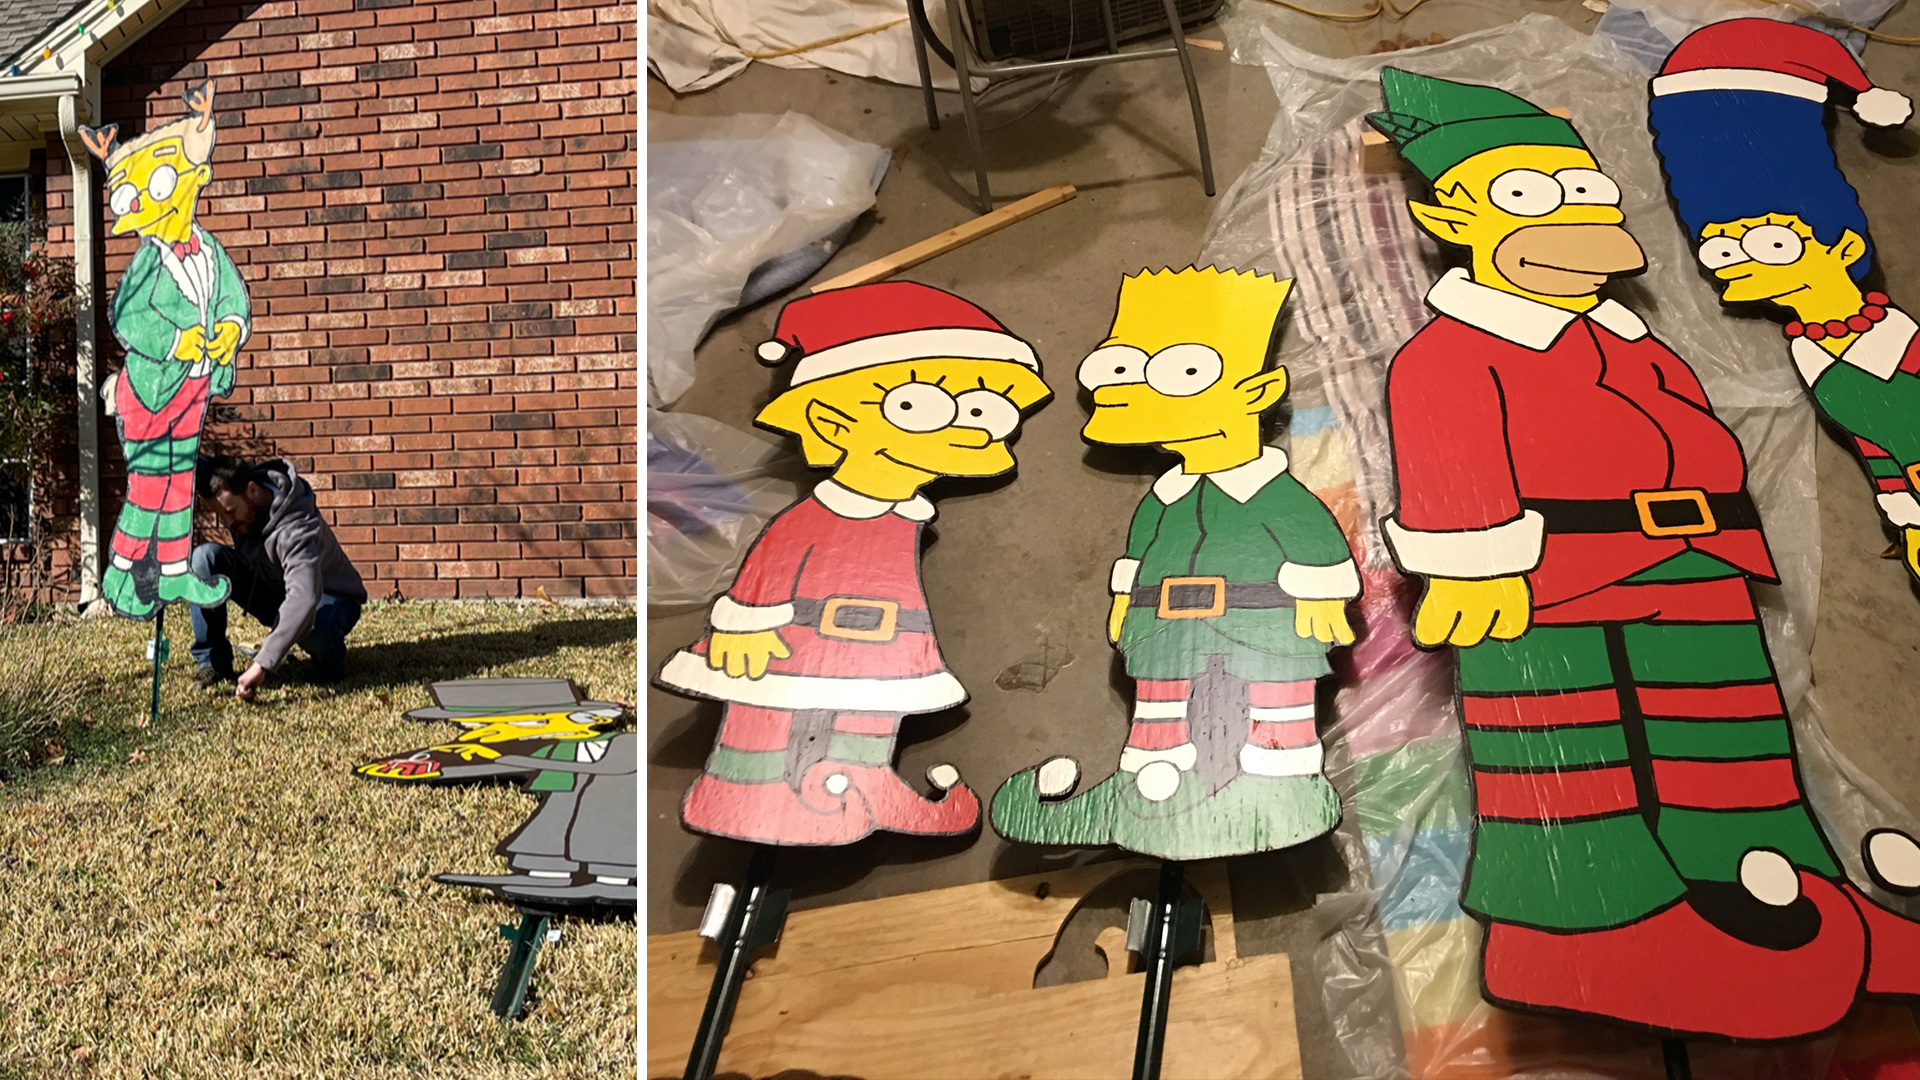
So thus began The Great Simpsons Christmas Cut Out Decorations Extravaganza. We first created the family — Homer, Marge, Lisa and Bart. Yes, I forgot Maggie. I honestly didn't realize until it was too late, I had plans for her — I just don't know what happened! Okay! Geeze. Well that was the first year, now each year we add new Simpsons characters to the collection and we're up to 12 now (plus, decor)! My ultimate plan is to take over the yard, so you can drive by dozens of characters just like the opener. It'll get there. Who do I add next?!
Here is my process to creating these each year. Create your own and share them with the world!
You will need...
Steps
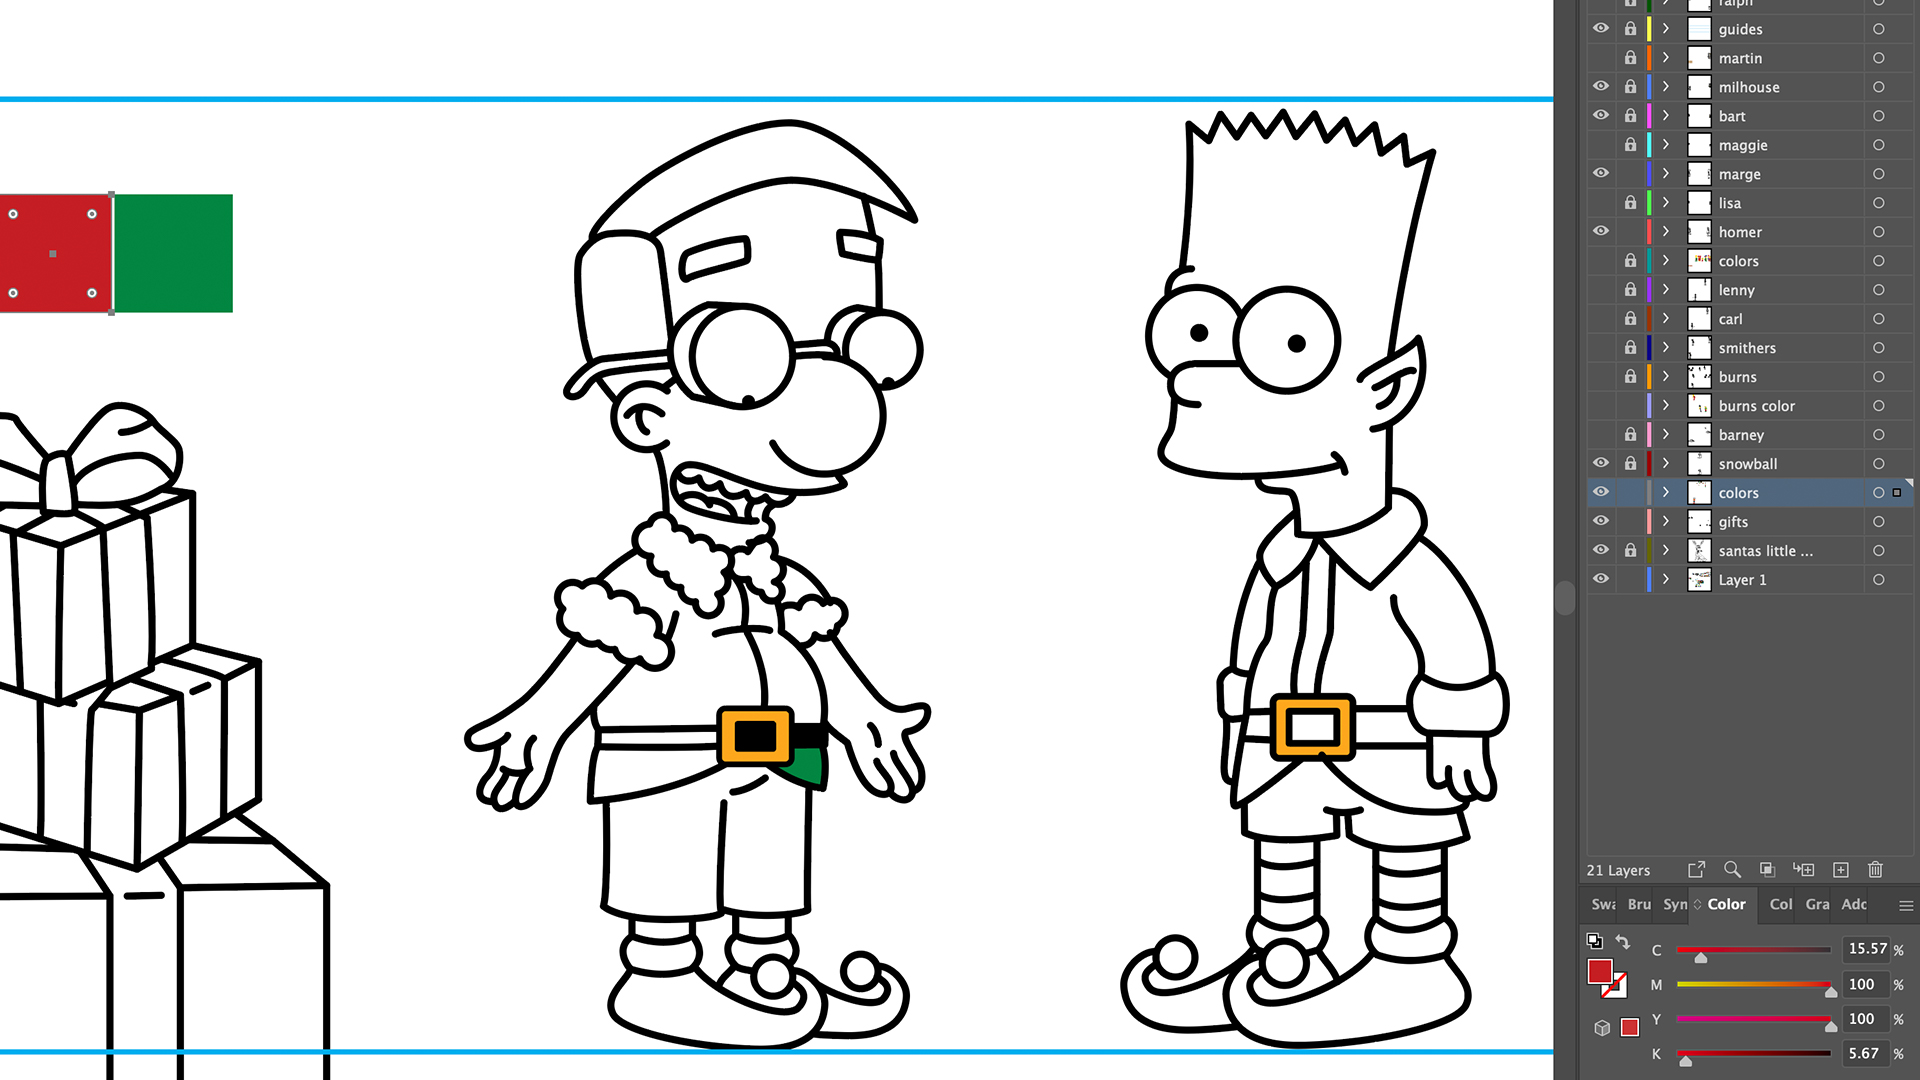
To get started I create each character in Adobe Illustrator. This can be done by just tracing the already made character or by combining several different screenshots and changing their outfits or colors to be holiday themed. I take the time to redraw all the art so the sizing and strokes will be consistent each time I make them. Taking note of the colors I'm using and simplifying them if needed. Then I add them to my template and print for the next step.
Pro Tip: Print an old character so you can better size them in the next step.
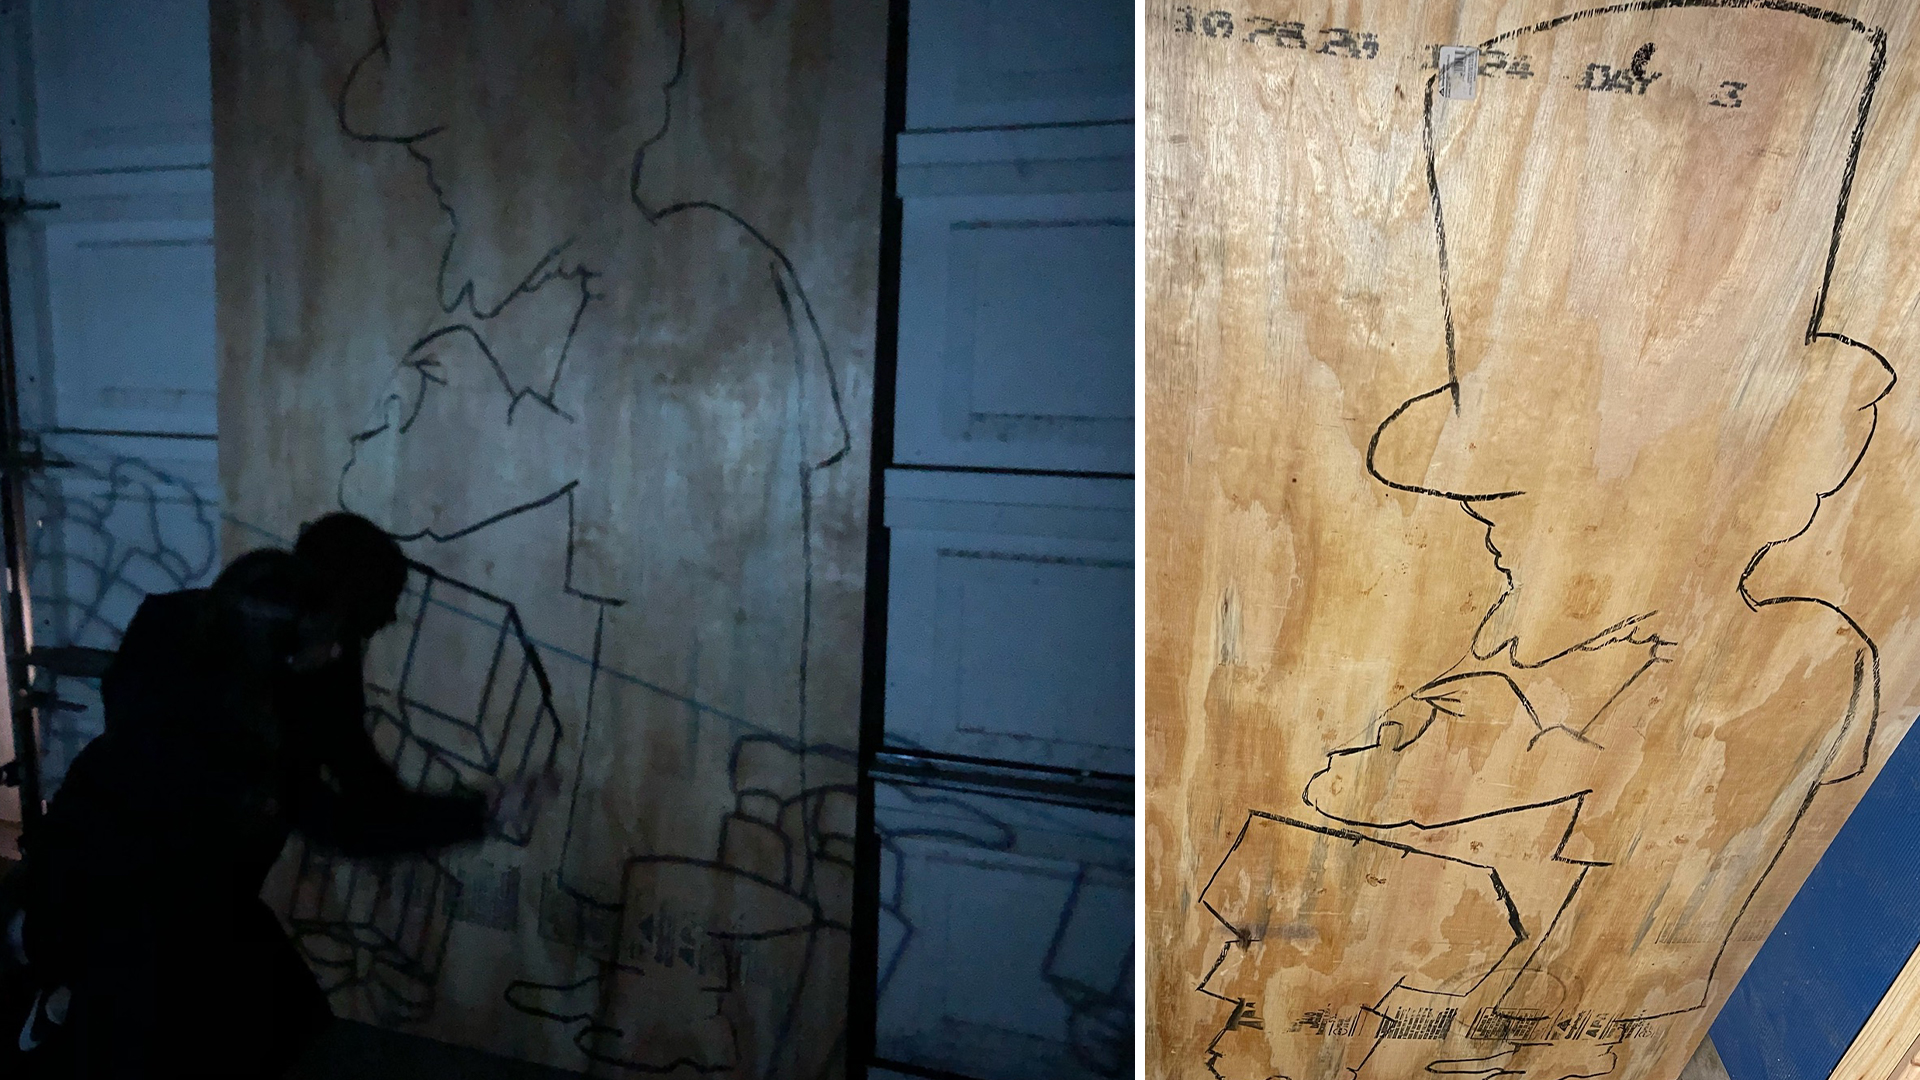
Project your image onto the plywood and find the right placement for the projector. If you've already have some made, compare to a previous character for appropriate sizing. Once your projector is in place, place your character on the board in some sort of way that makes sense and doesn't waste a bunch of wood when you cut. Trace the outline of the character, using a graphite or charcoal pencil to do any under drawing, permanent marker will bleed through, even through several layers of paint. Don't worry about details yet since you will be priming over everything anyway.
Pro Tip: Use a graphite or charcoal pencil to do any under drawing, permanent marker will bleed through!
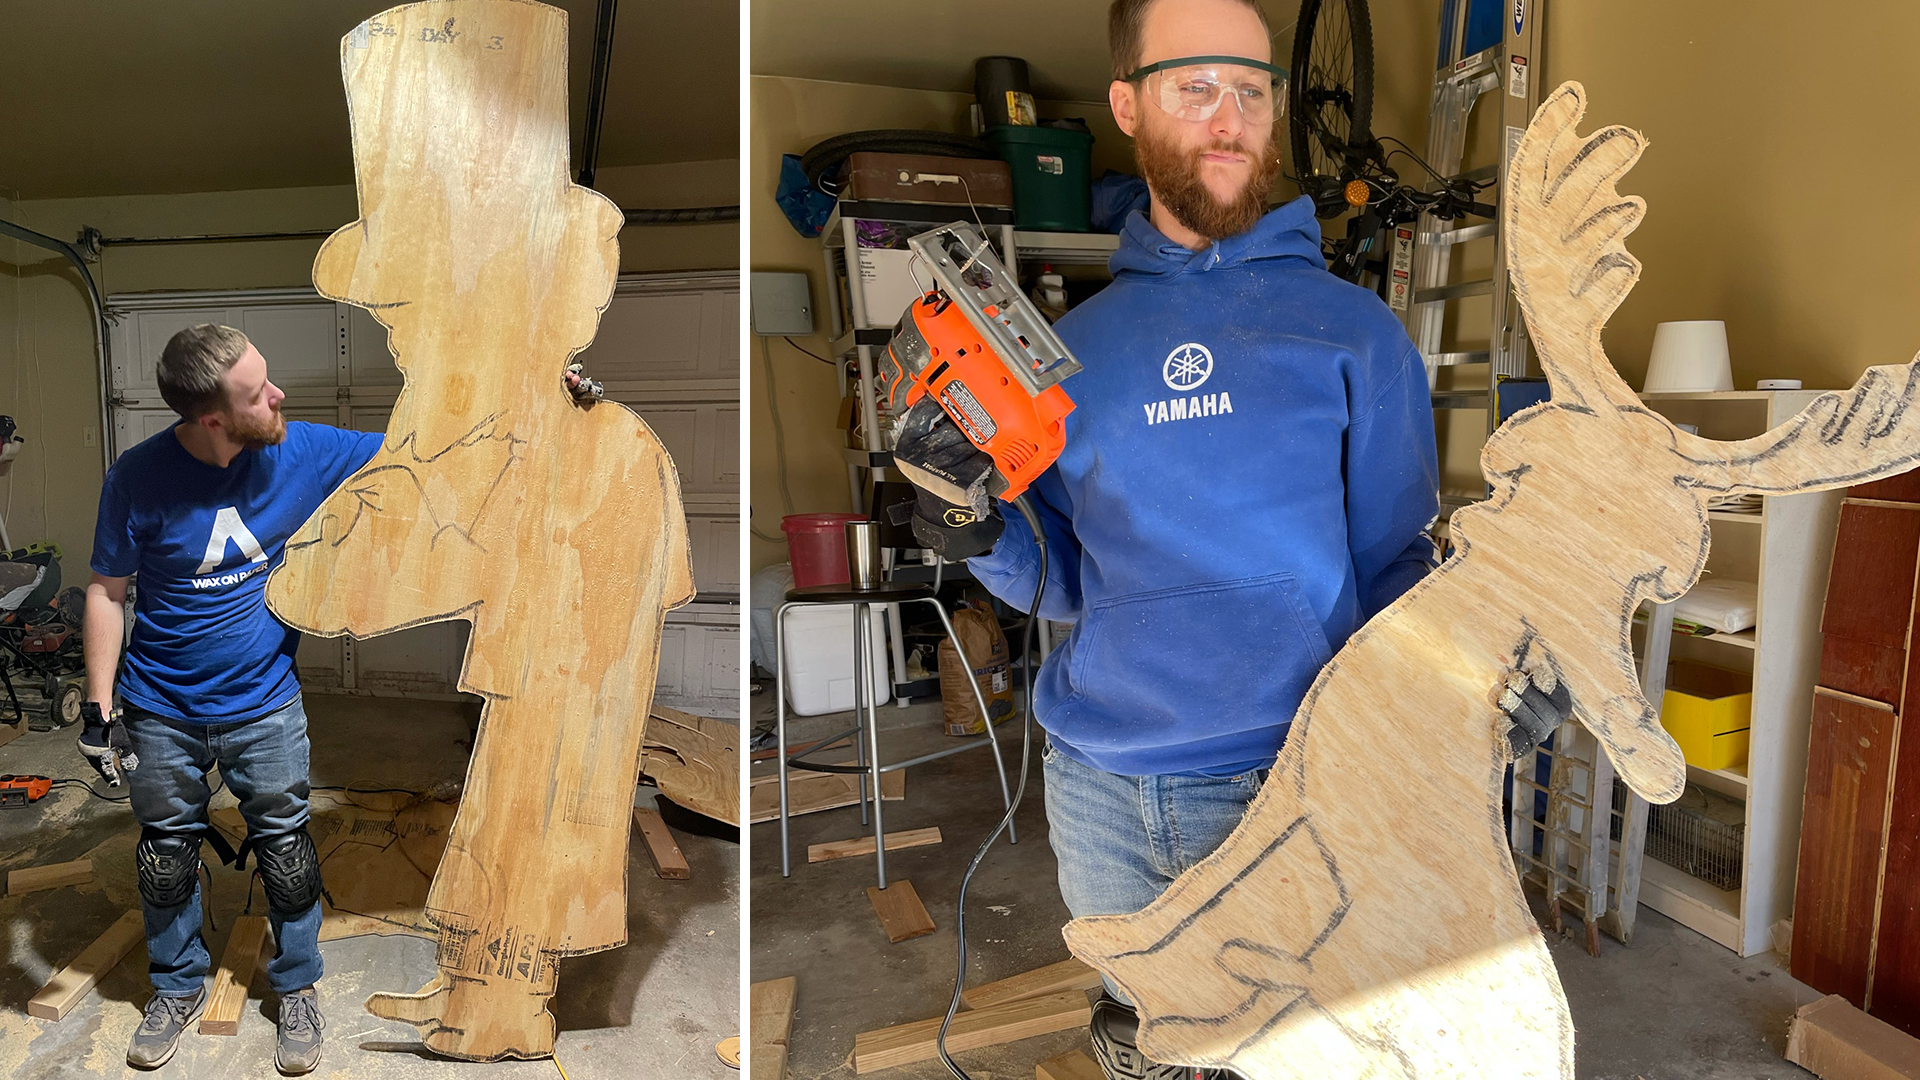
Once the outlines are on the plywood, you are ready to cut! Very carefully, cut out each shape using a jigsaw. Cut as near to the line as you can — The Simpsons are forgiving there as I will add a black outline and loose any weird cuts that may occur.
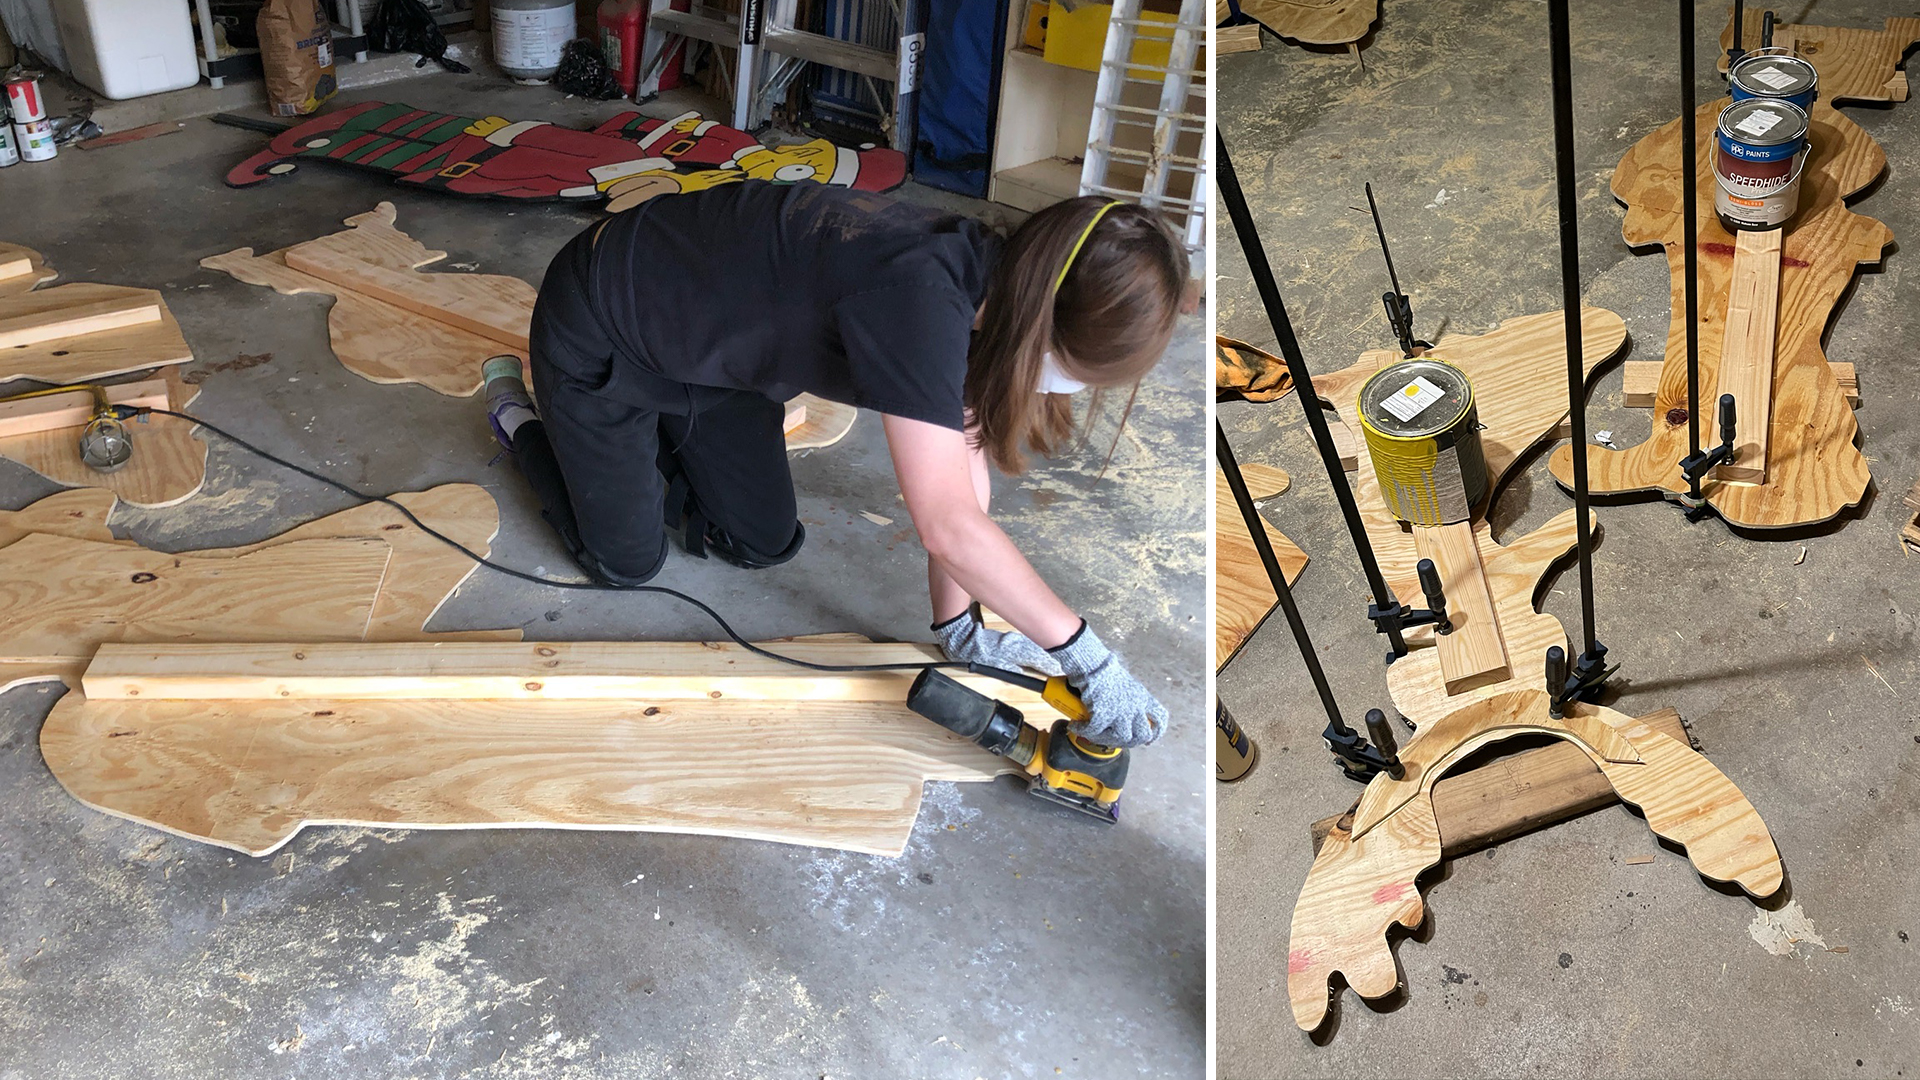
Next, you will add on your 2x4 toward the bottom of the character so you have something to screw the post to later. It also prevents you from seeing any screws on the art. Cut the 2x4 to about the same height of the character and glue to back. Let dry completely with lots of weights or clamps.
After your characters are cut and dry it's time to sand! We use an electric sander with XXX grit on both sides and XXX grit on the front. Be sure to get the edges and the 2x4 real good.
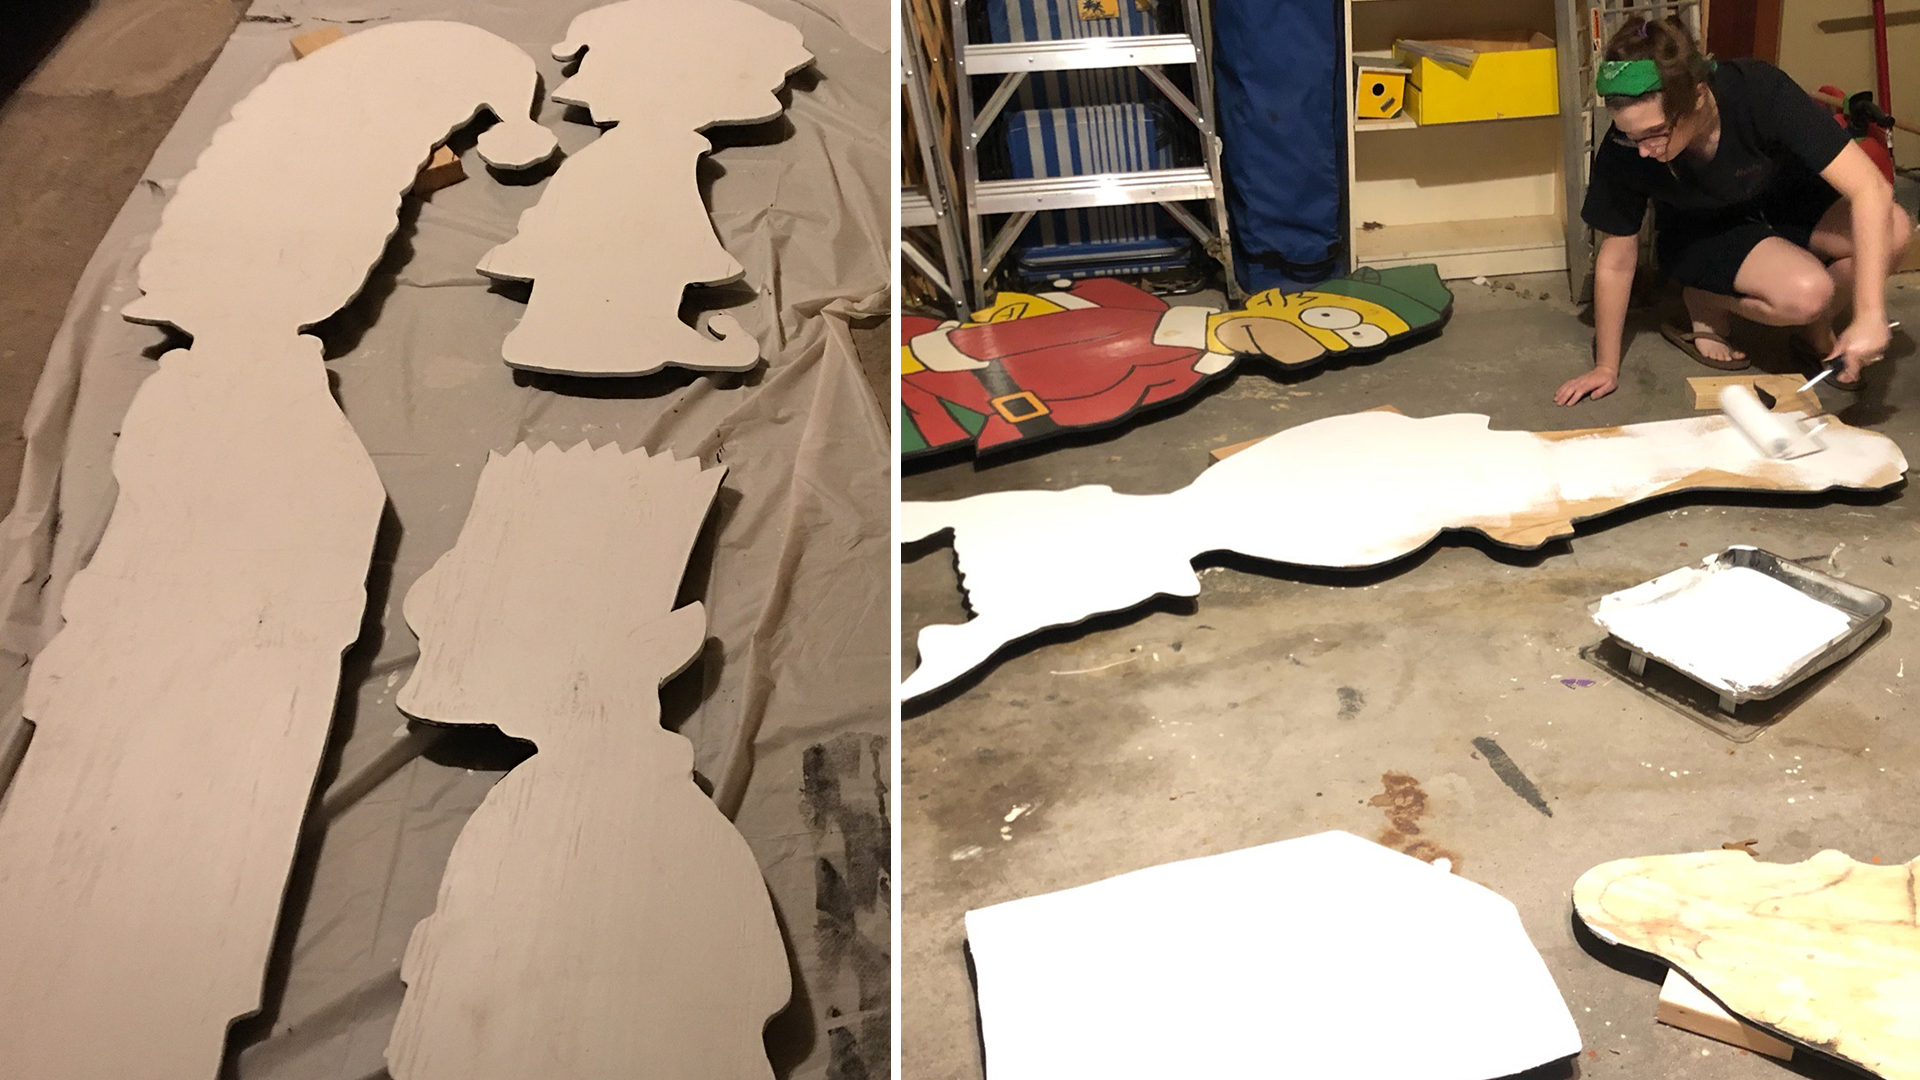
Wood is ready, noisy tools are put away. It's prime time, baby. Starting with the back (2x4 side) paint a couple of coats of your exterior black and allow to completely dry. Flip your characters and paint the front with Oil-Based White Primer, this should only need two coats — this stuff is thick. Be sure to use an oil-based primer, otherwise the knots in the wood will seep through eventually. Allow to dry in a well ventilated area completely.
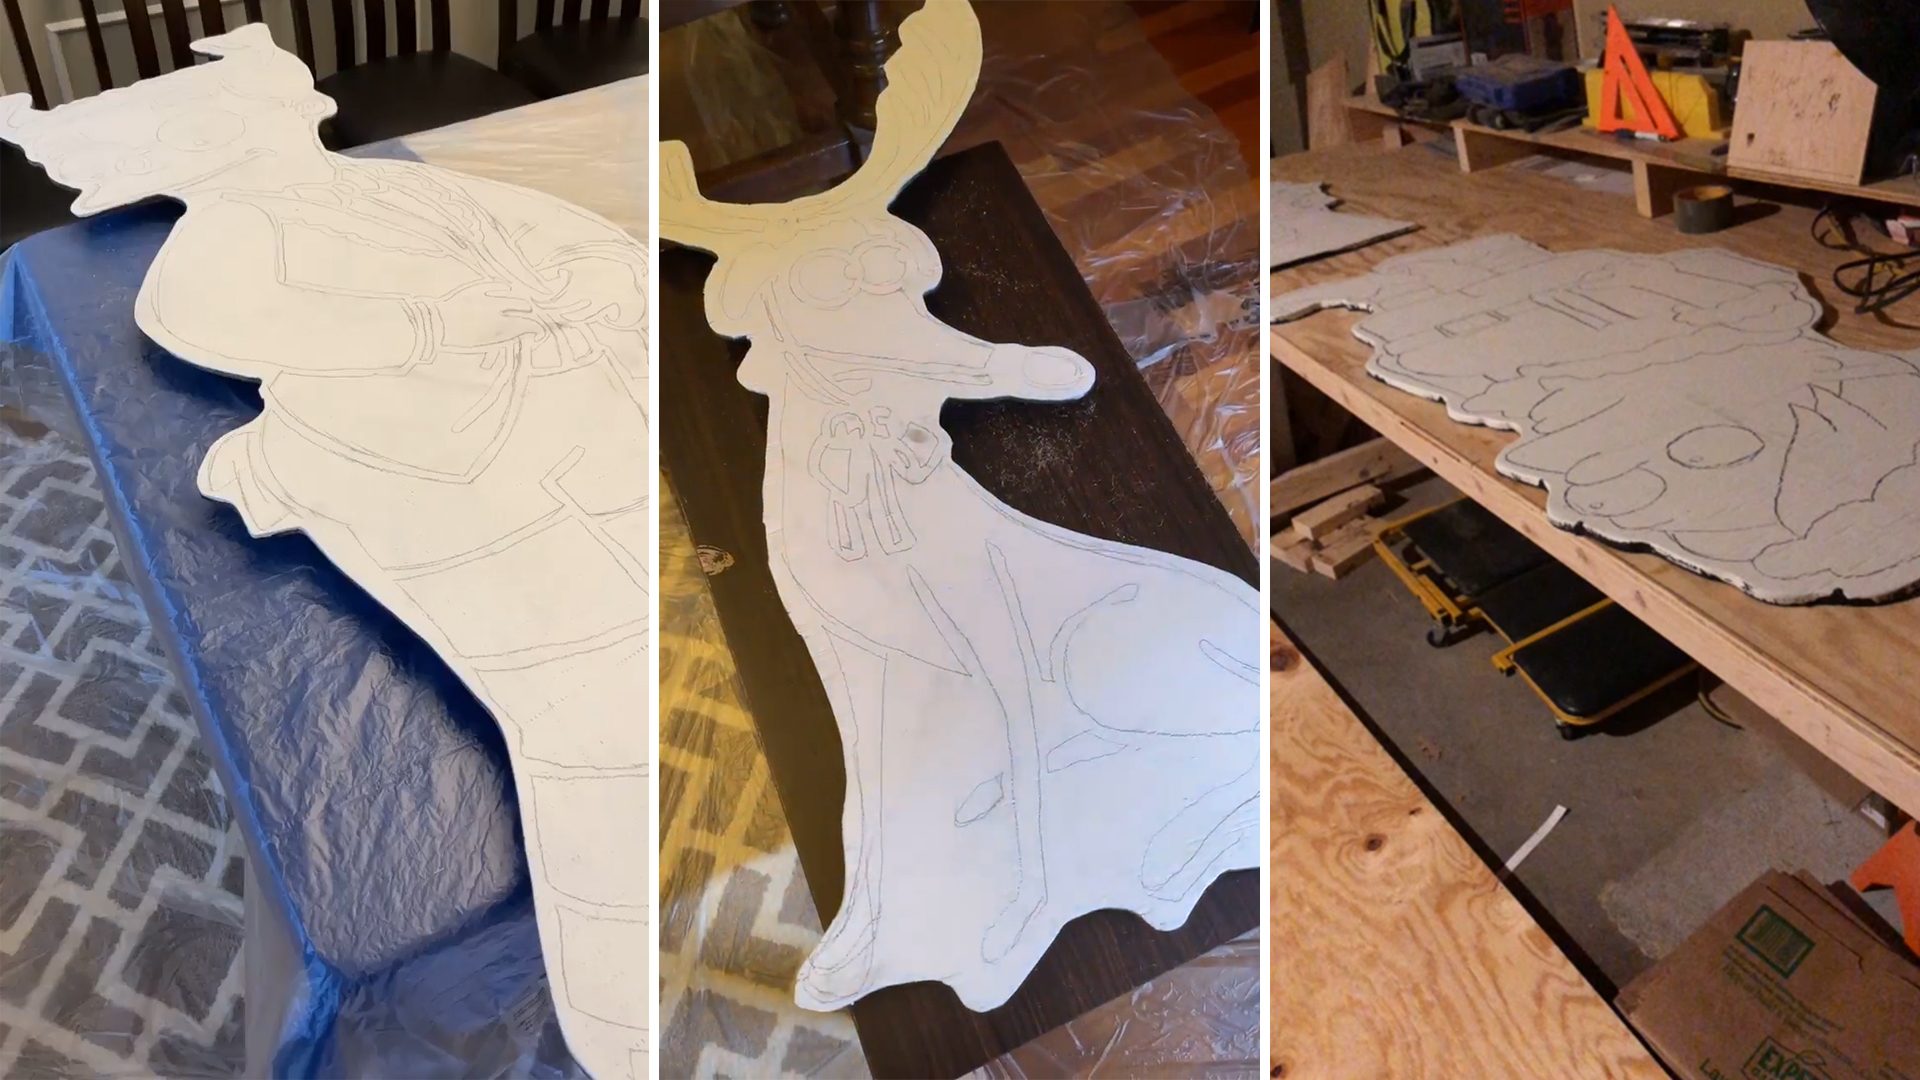
Get that projector back out and do your very, very best to align your character inside the cutout. This is a little difficult, as you will need to make minor adjustments to the projector placement and paper as you find the right spot.
Now we get to draw the entire character — yay! So relaxing. Anyway... Turn the lights off (giggity), breathe and carefully outline every stroke. I like to outline the inside shape so I end up with chunks of color and a can see the stroke placement later. Just be sure to get every line before moving the image or projector, I have had to go back and find a hand before — it is not fun realigning (again that is the hardest part of this whole project).
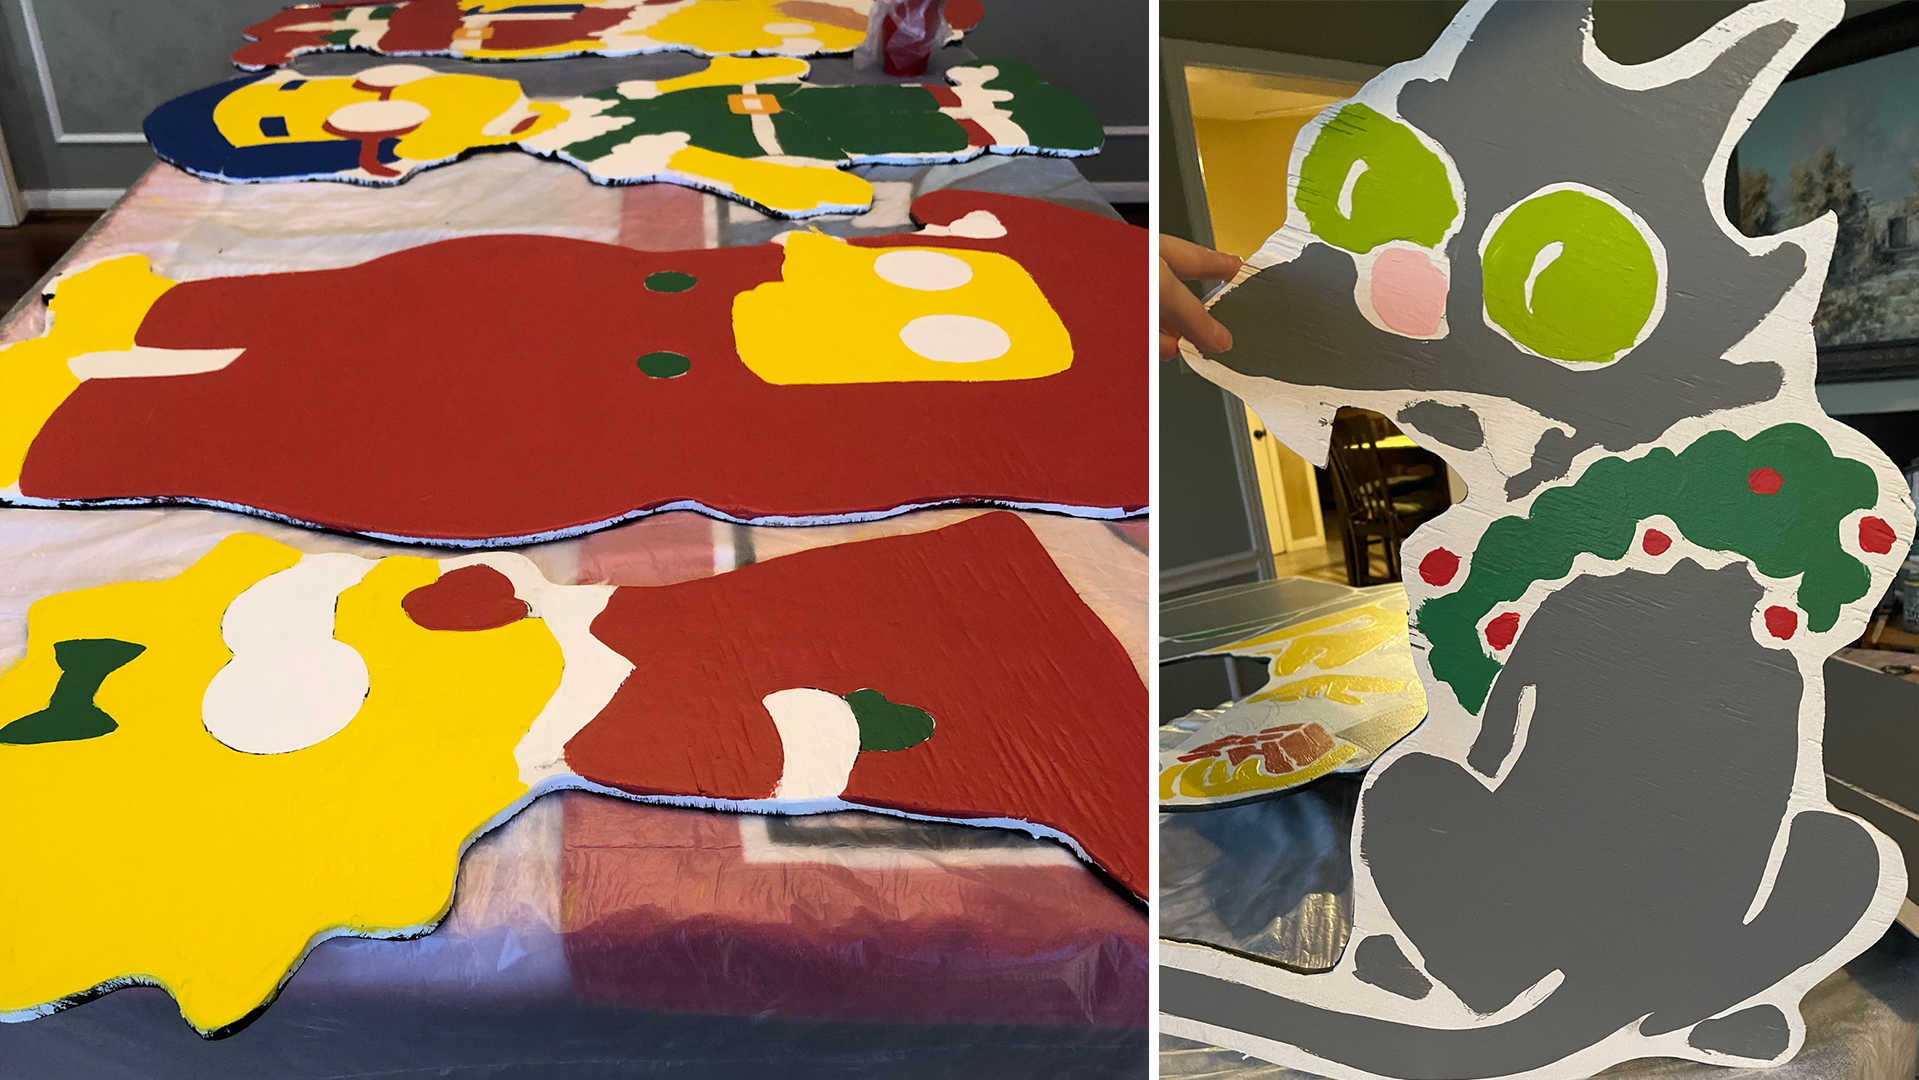
Be sure to have all your paints mixed and ready to go 'cause it's painting time.
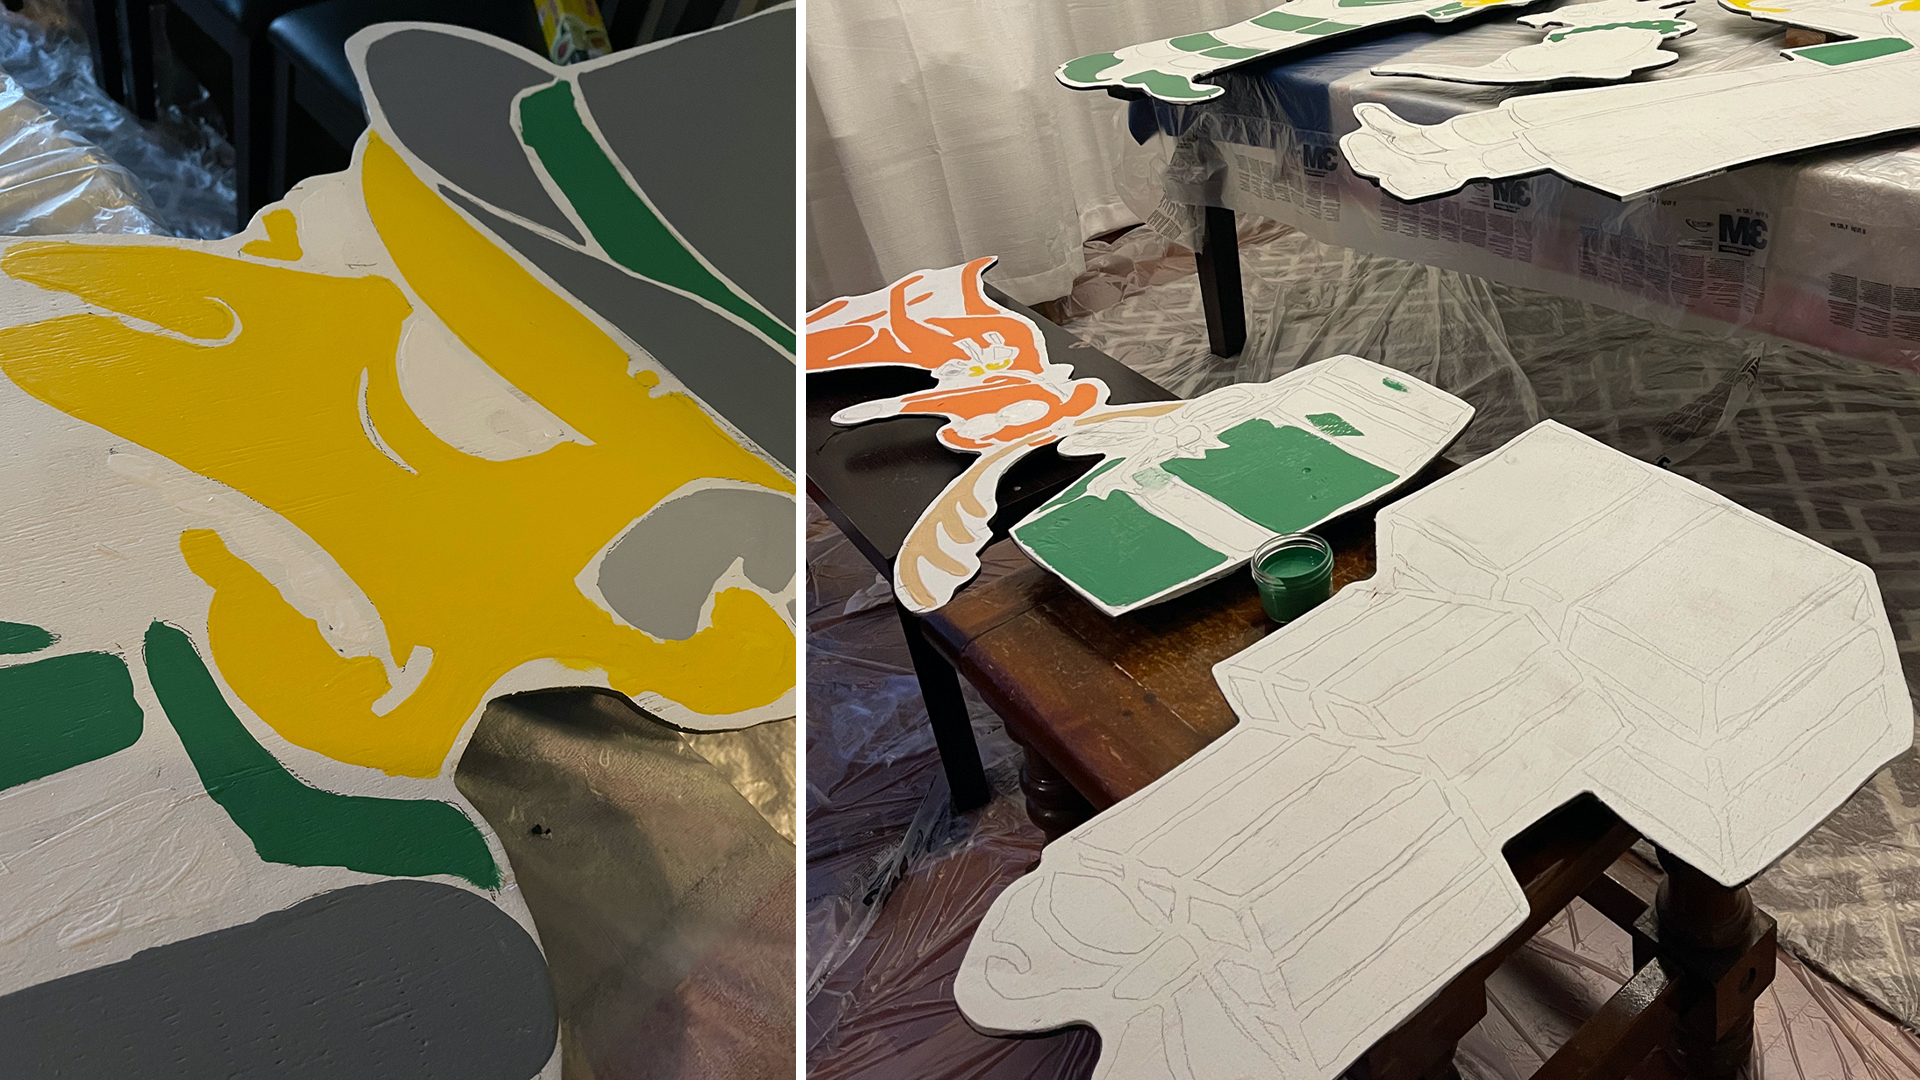
I've tried doing this a couple of ways, as you can see in the image, I think having a little gap for the stroke, like I have in Snowball (right), was better when adding the stroke, I had more control than I did doing edge to edge like Maggie (left). However, I think it was too much space and will modify next time.
I recommend starting with your light colors first, applying at least 3 coats to each color before moving to the next. Try to not overlay the colors, so you can know where your stroke is and not have to make too many corrections. You'll know when you've done enough layers and the color will be filled and flat. Repeat this step for every color in your character.
I create more than one character at a time so each color is applied on everyone before the next layer or color is applied. It makes the process more of an assembly line concept. Clean your brushes between every step and allow everything to dry completely. In cold weather this my take longer. (Since I'm a baby,) I work inside, so the humidity and temperature doesn't affect drying time and I don't freeze. Be sure your space is well ventilated and wear a mask, if necessary. Don't worry if they look a mess when you are done, the stroke will fix any issues.
Tip: Pour paint into 4oz mason jars with lids so your paint lasts longer.
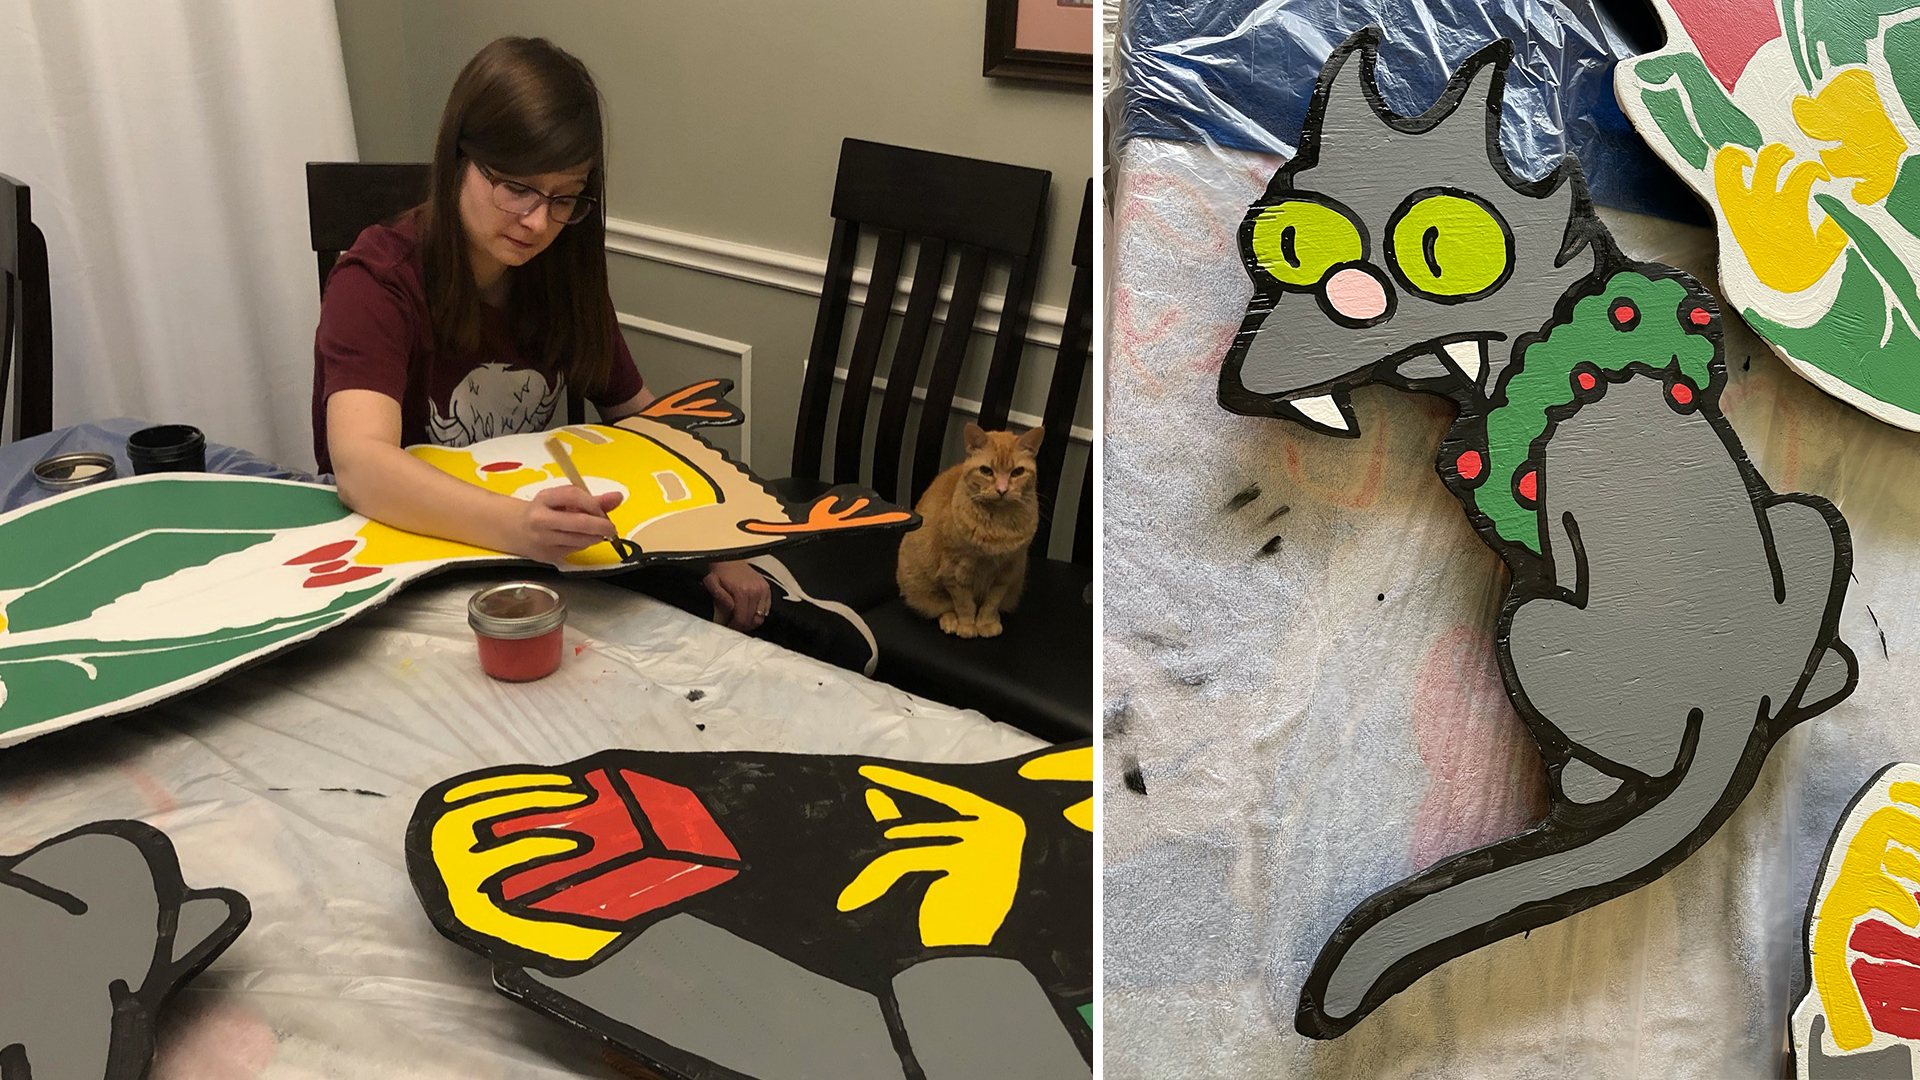
The outline is added once all the color layers have dried, my assistant provides purr-fessional criticism. Using a thinner brush (I use the 1/2" now), follow the painted fill lines to create your stroke. Add any additional strokes to character not between colors, such as fluff or arms, as well. Make sure the outline doesn't get out of hand or too thick. This is a slow, careful step and although little mistakes are not a big deal try your best to keep the stroke consistent and smooth. Add a few layers until it is opaque and no fill colors show through. Also, at this point be sure to get the edges and any negative space you want to knock out.
At this point, your characters should look basically finished. If anything looks off, be sure to fix before we finalize the design!
So, you are completely done, 100% happy and have no other changes to make? Wonderful! Let's clear coat. To be safe, move outside or into a garage and follow the directions on your polyurethane clear coat. Lay your characters face up, apply at least 2 coats of your polyurethane with a large brush, and allow to dry completely.
Once fronts are done and dry, carefully flip characters over to be face down and apply a couple of coats of polyurethane to the back. I recommend laying a plastic painters sheet over some towels, just to be safe.
While still face down, screw the fence posts to the 2x4. These are basic steel posts from the hardware store, sized to fit each character. Be sure to think about weight, as well as, height when buying these as there are options on thickness and height. Simply, drill these to the backs of your 2x4s and you're done!
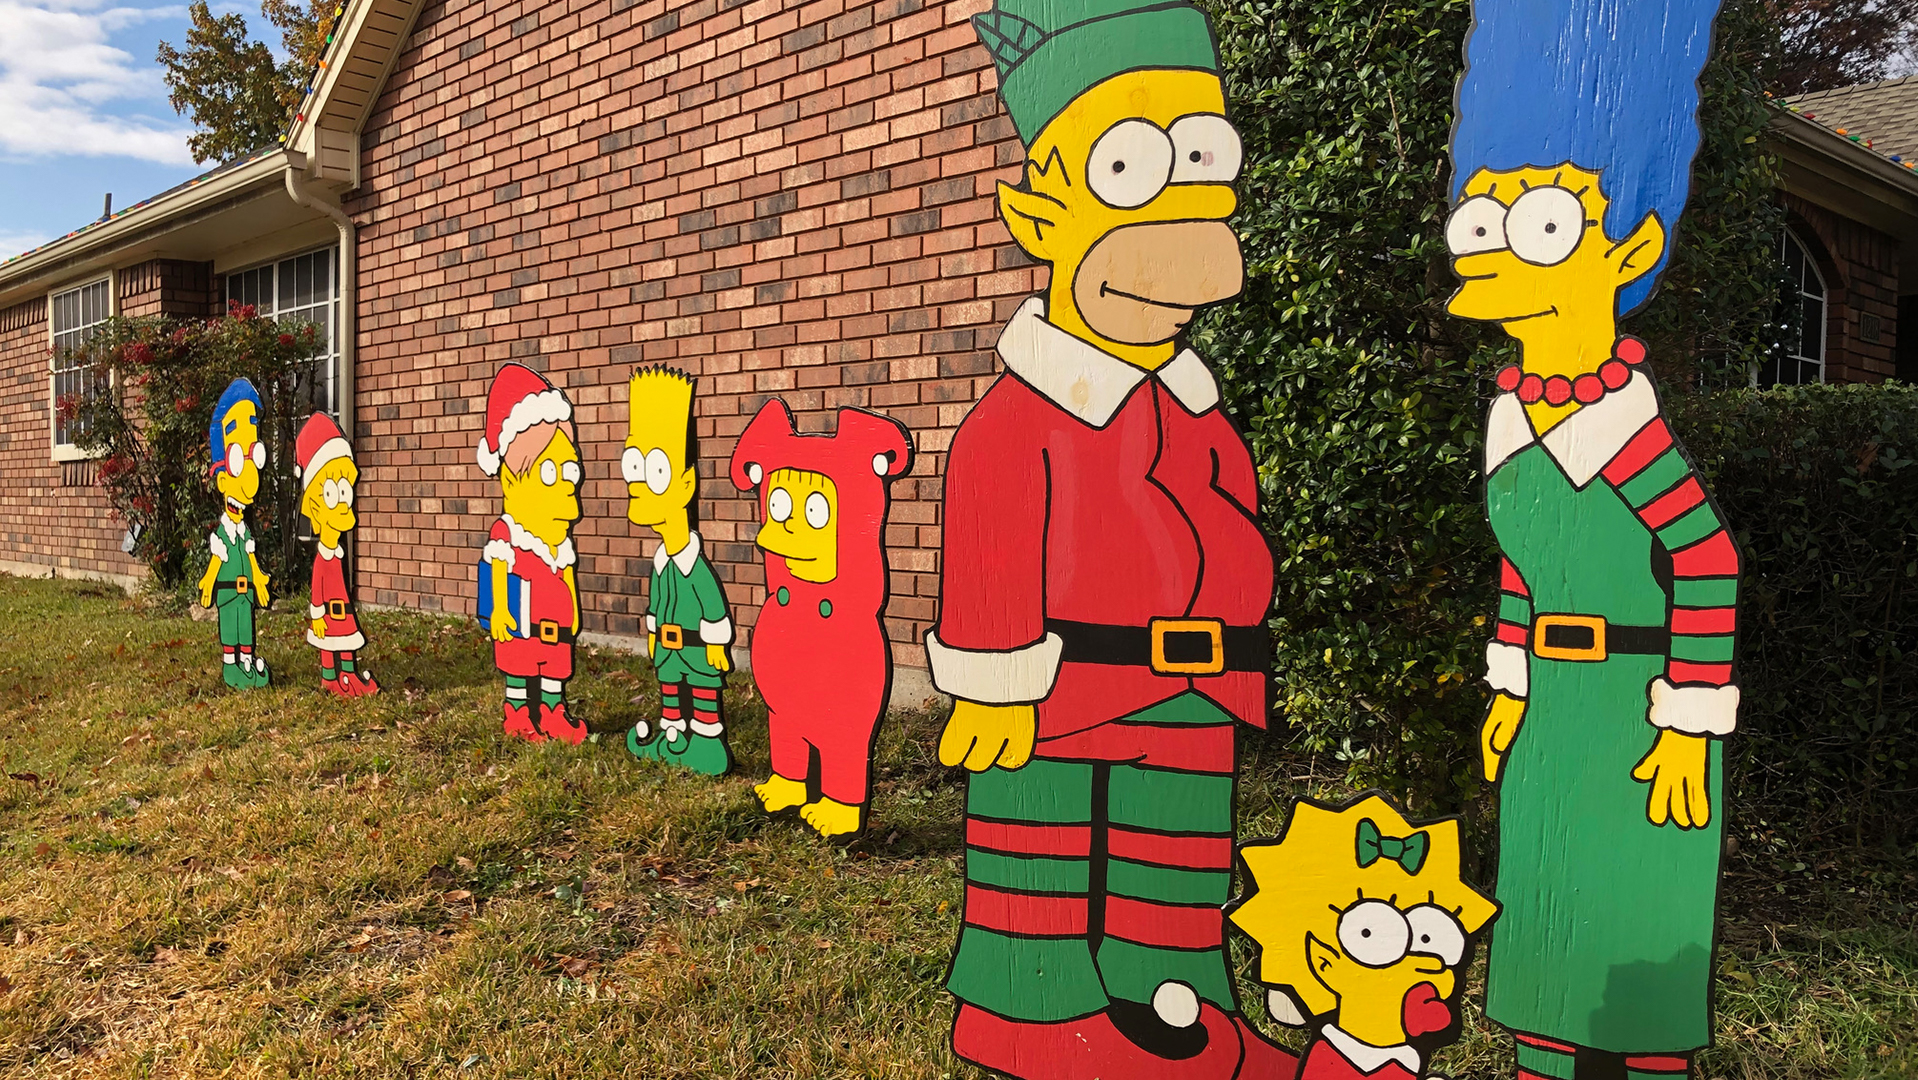

Congrats! You've completed your yard art characters — time to show them off! It's yard art after all, so put them in the yard. Light them up with spotlights at night so they can always be enjoyed. Make your neighbors proud to live in a neighborhood with such awesome art. Or, annoy them when you create dozens more and take over the entire corner lot. Yeah, that's the goal.
Good luck and keep on yard artin'!

